Access rules
Access rules allow you to create a logic by which users are allowed to interact with the different entities of Rainmaker. This section allows you to be very specific on what users can see and do with content, modules, support information, call requirements sets, skins, and post-call requirements.
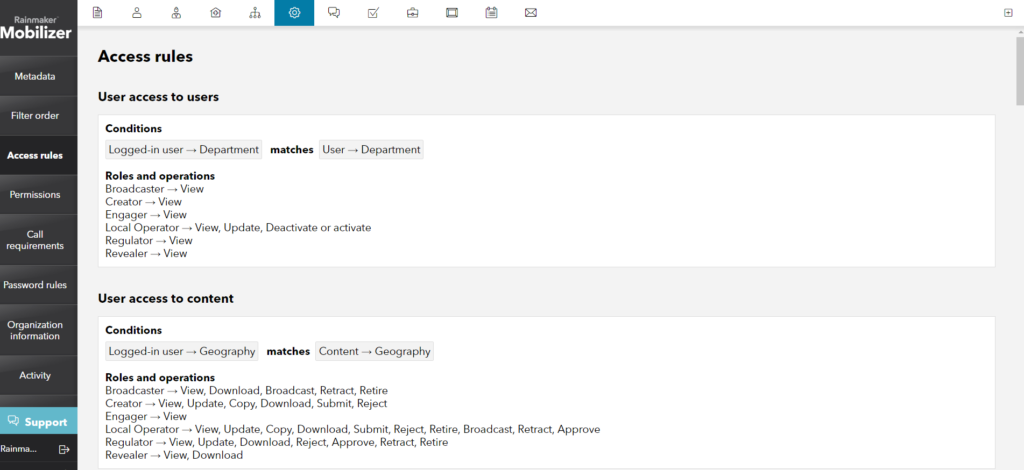
Generally, this section will be used to restrict or enable different features according to local needs and regulations of your organization. For example, if different departments must handle the editing, approval and distribution processes of content, then rules can be created to ensure each department has exclusive rights over their process.
There are two elements interacting to determine the rules: Conditions and Operation.
Conditions
These use the existing categories to determine which users and attributes should be affected by the rule. There are three types of conditions:
- Joining conditions will look at the logged-in user’s attributes and the object’s attributes (e.g. User’s Geography to Content’s Geography)
- Logged-in user limiting conditions will look at the logged-in user’s attributes and specific attributes (e.g. User’s Geography matches China)
- Entity limiting conditions will look at a specific object attribute and a specific tag (e.g. Content’s Department to Marketing department)
Operation
These contain the roles available in the organization and the actions they can perform to interact with each entity.
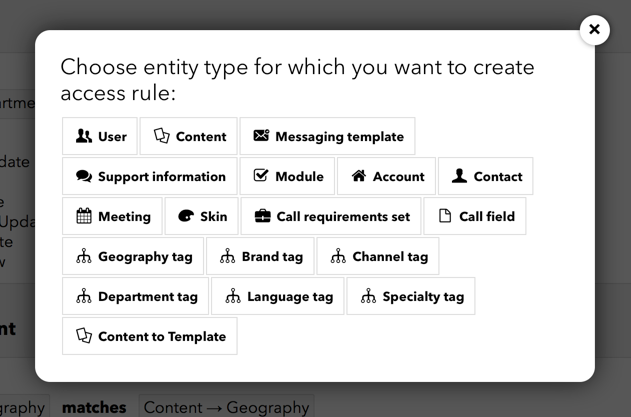
Creating new rules
To create a new rule, click on the button in the upper-right corner of the window. A modal window will appear, select the object for which you wish to create a rule:
The image below shows the example of a User based rule:
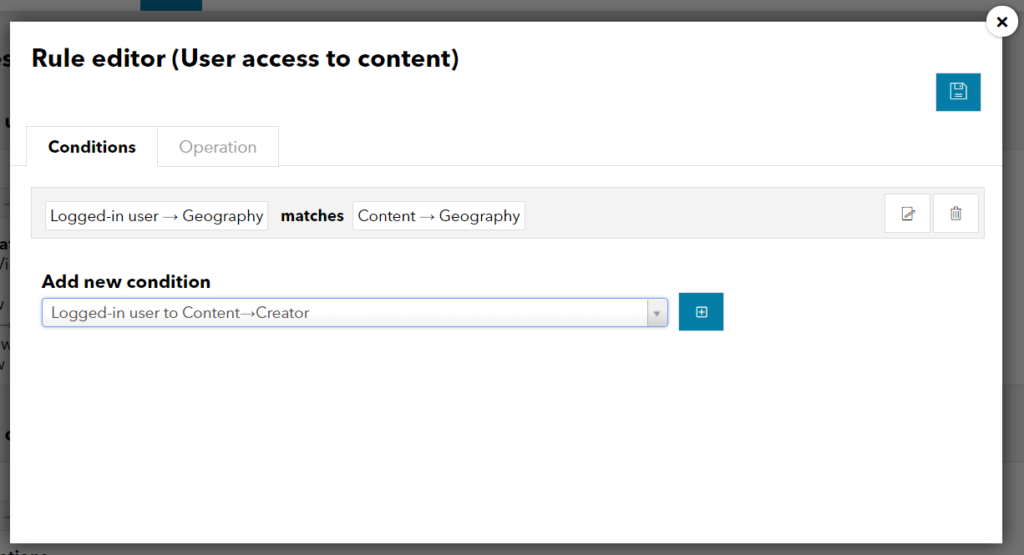
This example shows that for a user to see content in Mobilizer, the user logging in needs to have a geographic metatag (e.g., Denmark) that matches that of the content (also tagged Denmark).
To add tconditions to the rule, open the drop-down menu under Add new condition. There are three types of conditions described in section 9.3.1 of this document. These will appear with the available options, which are defined by the existing metadata categories. Choose the desired one and click on the + button.
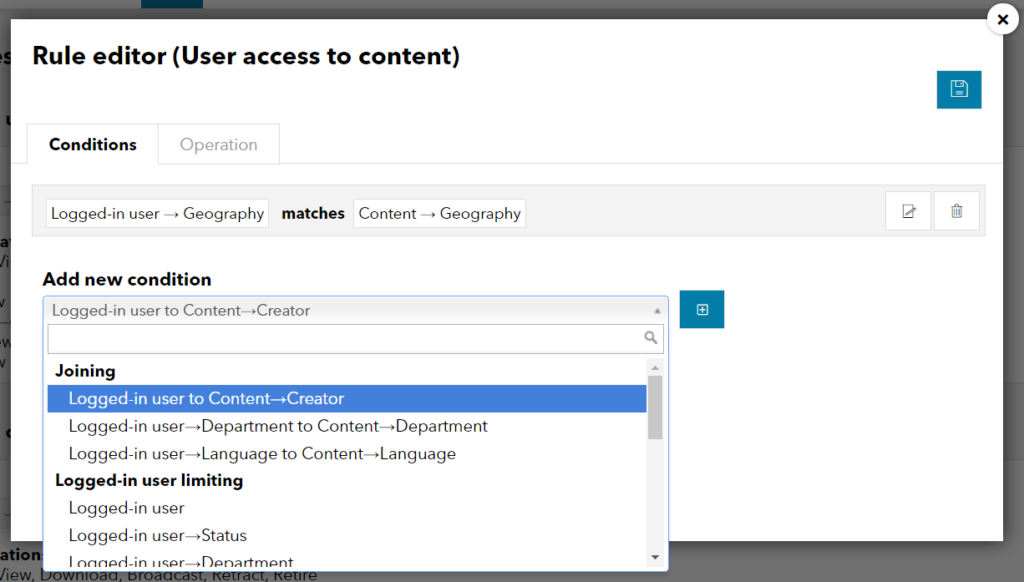
The new condition will appear in the same modal window. You can add more than one rule; to do so follow the same procedure as stated above.
In the case of Logged-in user limiting and Entity limiting conditions, the default condition will appear as “(none selected)”. To select one, click on the edit button on the right end of the condition. The edit view will appear.
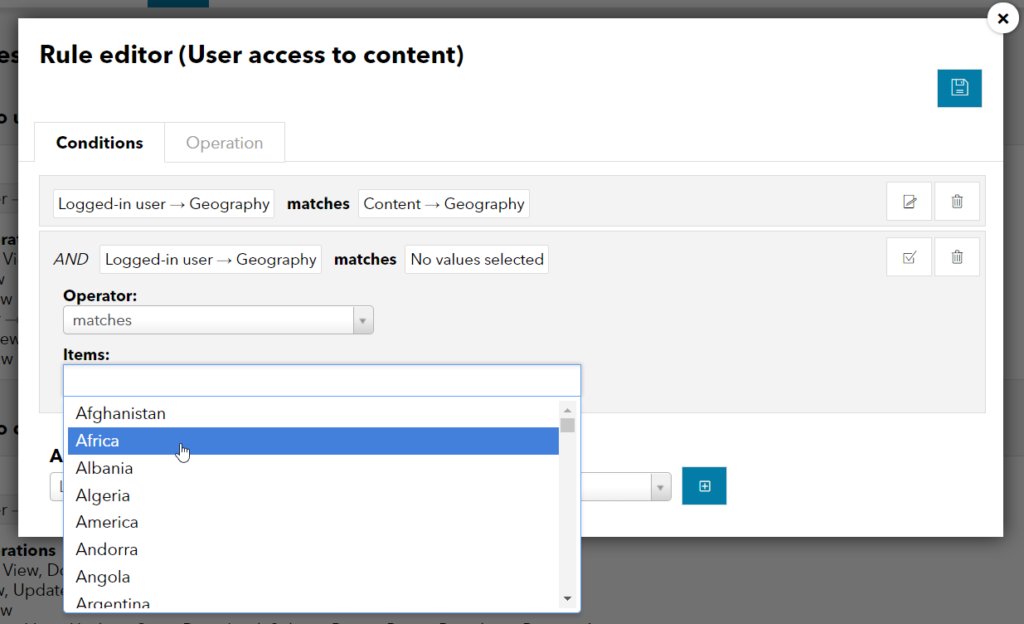
Choose the condition and save by clicking on the check mark icon button.
Rule operators
Four operators are available to control where rules are applied:
- Matches
- Matches upwards
- Matches downwards
- Matches exactly
Matches matches the tag with its relations throughout the structure. For example, a rule that uses the operator Match for the geography tag Berlin would match with every contact, piece of content or account tagged Berlin, that has been tagged as a child of Berlin, or that is a parent of Berlin – Germany, Europe, EMEA, and so on.
Matches upwards matches the tag with its relations above it in the structure. For example, a rule that uses the operator Match upwards for the geography tag Berlin would match with every contact, piece of content or account tagged Berlin and that is a parent of Berlin – Germany, Europe, EMEA, and so on.
Matches downwards matches the tag with its relations below it in the structure. For example, a rule that uses the operator Match downwards for the geography tag Berlin would match with every contact, piece of content or account tagged Berlin and that is a child of Berlin.
Matches exactly matches the tag with its relations that are an exact match it in the structure. For example, a rule that uses the operator Match exactly for the geography tag Berlin would match with every contact, piece of content or account tagged Berlin and nothing else.
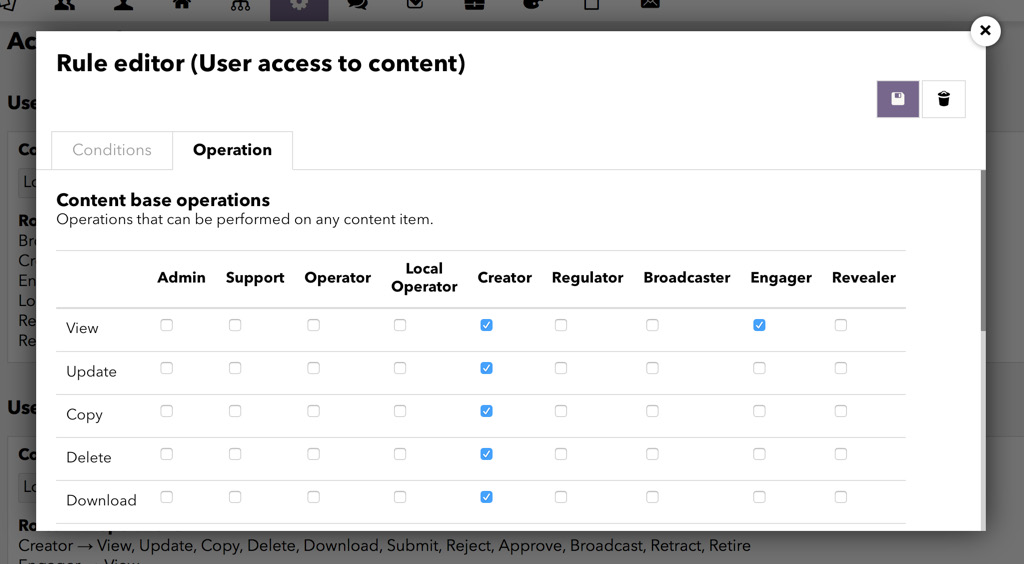
Rule operations
In the same modal window, you will see a second tab named Operation that lists the different operations the different roles can perform. Enable actions for each role by simply marking the corresponding checkbox:
Important: Rules provide permissions for the users to perform a certain task, but it does not ensure the feature will be available in the user’s interface.